
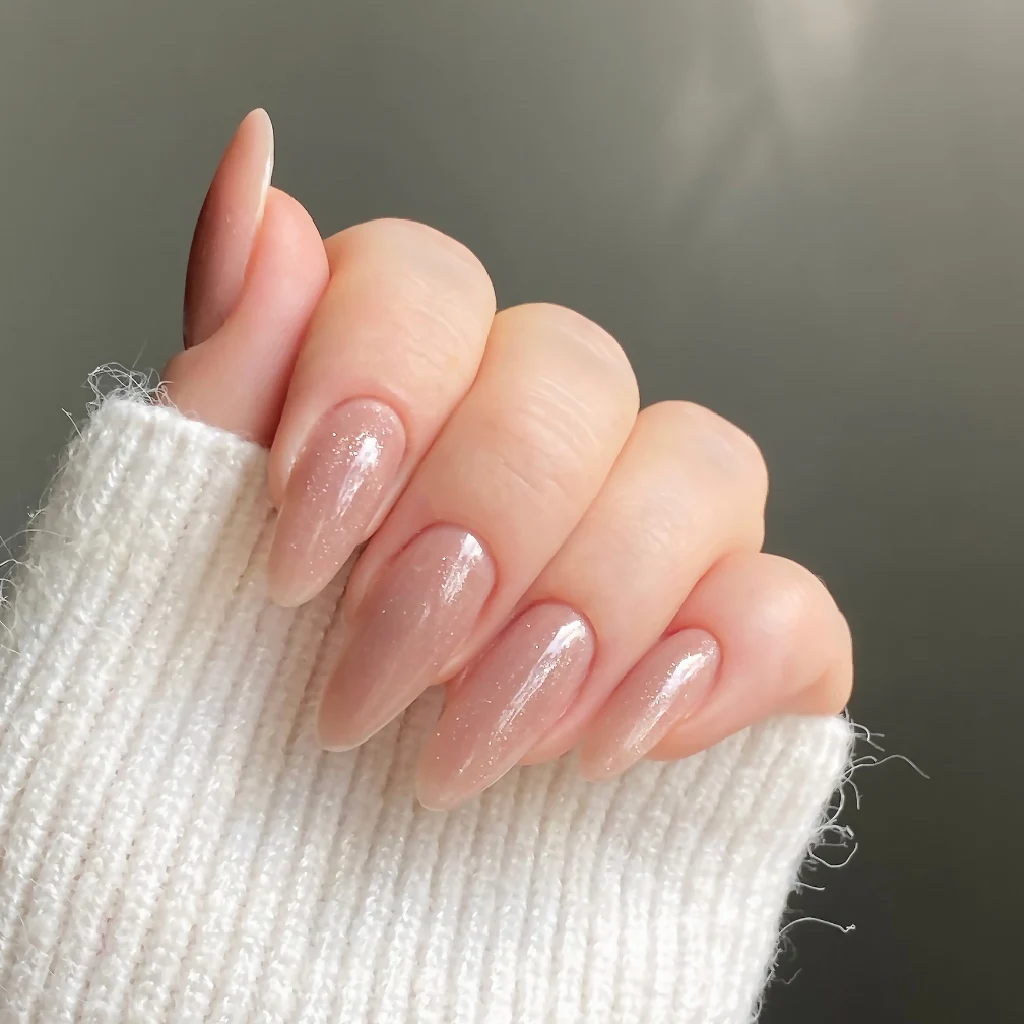
This guide covers everything about How to Remove Acrylic Nails Safely at Home. Ever considered ripping off old acrylic nails in a rush? Stop right there. This common impulse can lead to thin, painful, and damaged natural nails. Fortunately, removing acrylic nails safely at home is entirely achievable with the correct methods and a good dose of patience. This guide, updated for April 2026, provides expert-backed techniques to ensure your natural nails remain healthy and intact throughout the removal process.
Latest Update (April 2026)
As of April 2026, the focus in nail care continues to be on gentle, effective removal techniques that prioritize the health of the natural nail. Recent discussions in beauty publications highlight the importance of patience and the right tools, whether using acetone or alternative methods. For instance, articles like those found in Marie Claire and Allure continue to stress the dangers of forceful removal, emphasizing that proper soaking and gentle manipulation are key. and, the market has seen a continued rise in high-quality nail care products designed to support nail recovery post-acrylic removal, making at-home care more effective than ever.
Why You Should Never Rip Off Acrylic Nails
Acrylic nails adhere to your natural nails using strong adhesives. Ripping them off forcefully can strip away layers of your natural nail plate, leading to a host of problems:
- Pain and Sensitivity: The natural nail bed can become exposed and highly sensitive to touch, temperature, and even air.
- Thin, Bendy Nails: Layers of the natural nail can be damaged, leaving them weak, thin, and prone to peeling or tearing.
- White Patches and Peeling: These are often signs of trauma to the nail plate, indicating damage from improper removal.
- Long-Term Nail Damage: Repeated aggressive removal can weaken the nail matrix, affecting future nail growth and strength.
According to experts cited in publications like Allure, maintaining the integrity of your natural nail is really important. Forceful removal is consistently warned against as it can cause significant, sometimes lasting, damage.
What You’ll Need Before You Start
Gathering these essential tools before you begin the removal process will ensure a smoother and safer experience:
- Nail clippers
- Nail file (100-180 grit range is ideal)
- Pure acetone (ensure it’s 100% acetone for effectiveness)
- Cotton balls or pads
- Aluminum foil
- Cuticle pusher or orangewood stick (metal or plastic)
- Small bowl or basin
- Nail buffer
- Hand towel
Optional but highly recommended tools for post-removal care include cuticle oil and a good quality hand moisturizer.
How to Remove Acrylic Nails Using Acetone: The Most Effective Method
Here’s widely considered the safest and most effective method for removing acrylics, provided it’s done with care and patience. As noted in recent beauty guides, the key is to allow the acetone to do the work.
Step 1: Trim the Acrylic Nails Down
Using nail clippers, carefully trim the acrylic nails as short as possible. This reduces the amount of acrylic that needs to be dissolved and minimizes the risk of snagging during the soaking process.
Step 2: File Off the Top Layer
Gently file away the shiny topcoat of the acrylic. Focus on removing the sealant and any colored polish. You don’t need to file deeply into the acrylic itself, just enough to break the surface seal. This allows the acetone to penetrate more effectively. Reports from nail technicians suggest that over-filing at this stage can damage the natural nail, so proceed with caution.
Step 3: Soak Cotton in Acetone
Saturate cotton balls or pads with pure acetone. Ensure they’re wet but not dripping excessively.
Step 4: Apply Cotton and Wrap with Foil
Place one soaked cotton ball onto each acrylic nail, ensuring good contact with the acrylic surface. Then, wrap each finger tightly with a piece of aluminum foil. The foil helps to trap heat — which can speed up the acetone’s dissolving action, and prevents the acetone from evaporating too quickly.
Step 5: Wait Patiently
Allow the nails to soak for approximately 20 to 30 minutes. It’s important to remain undisturbed during this time. If the acrylic is especially thick or has been on for a long time, you may need to extend this soaking time. Avoid the temptation to peek or pull too early.
Step 6: Gently Push Off the Acrylic
After the soaking period, carefully unwrap one finger at a time. The acrylic should have softened considerably. Use a cuticle pusher or orangewood stick to gently push off the softened acrylic material from the nail plate. Start from the cuticle area and work your way down the nail. If the acrylic resists or feels hard, don’t force it. Re-wrap the nail with fresh acetone-soaked cotton and foil, and soak for an additional 10-15 minutes.
Step 7: Light Buffing (Only If Needed)
Once the bulk of the acrylic has been removed, you may find small amounts of product remaining. Use a gentle nail buffer (around 180-240 grit) to lightly buff away any stubborn residue. Be extremely gentle to avoid thinning or damaging your natural nails. If any part of the acrylic is still very difficult to remove, it’s better to soak again than to risk damaging your natural nail.
How to Remove Acrylic Nails Without Acetone
While acetone is the most efficient solvent, some individuals prefer to avoid it due to its drying properties or sensitivities. Non-acetone methods are generally slower and may be less effective on very thick or strongly adhered acrylics. These methods are often best suited for lifting acrylics or for those with very thin natural nails.
Warm Water and Oil Soak
A popular alternative involves soaking nails in a mixture of warm water and a generous amount of cuticle oil or olive oil. Submerge your fingertips for 30 to 40 minutes, or until the acrylic feels pliable. Afterward, gently try to lift or push off the acrylic using a cuticle pusher. Avoid prying or forcing the material, as this can still damage the natural nail. This method requires significant patience and may need to be repeated.
Nail Dehydrator/Remover Solutions
Some specialized nail products are designed to soften acrylics without relying on pure acetone. Here are typically applied by soaking or painting onto the nail. Always follow the manufacturer’s instructions carefully. While often gentler, their effectiveness can vary, and they may still require a manual removal step.
What NOT to Do When Removing Acrylic Nails
Avoiding common mistakes is just as important as using the right technique. Here’s what to steer clear of:
- Ripping or Peeling: Never, ever pull or peel acrylics off your natural nails. Here’s the fastest way to cause significant damage.
- Being Aggressive with Tools: Avoid using excessive force with metal tools like cuticle pushers or files. Aggressive scraping can goumen or gouge the natural nail plate.
- Over-Filing: don’t aggressively file down the acrylic to the point where you’re filing into your natural nail. This thins and weakens the nail significantly.
- Skipping Aftercare: Neglecting nail and cuticle care after removal can prolong recovery time and leave nails vulnerable.
- Using Unsuitable Products: Avoid using standard nail polish remover — which contains different solvents and is far less effective than pure acetone for acrylic removal.
Nail Aftercare: What to Do Once Acrylics Are Off
Once the acrylics are removed, your natural nails may appear thin, dry, and perhaps slightly discolored. Proper aftercare is essential for their recovery and to restore strength and health. As reported by nail health experts, consistent care can lead to significant improvements.
Hydrate Immediately
As soon as the acrylics are off and any remaining residue is gently buffed away, apply a generous amount of cuticle oil to your nails and surrounding skin. Massage it in well. This helps to replenish lost moisture.
Strengthen and Protect
Consider using a nail strengthener or hardener, but apply it sparingly. Some strengtheners can make nails brittle if overused. Look for formulas that also contain nourishing ingredients. Allow your natural nails to ‘breathe’ for a period before considering new enhancements. Taking breaks is often recommended. a break every 2-3 months is advisable to maintain nail health, according to industry professionals.
Moisturize Regularly
Continue to apply cuticle oil daily and use a rich hand cream multiple times a day, especially after washing your hands. Hydrated nails are less prone to breaking and peeling.
Be Gentle
Avoid harsh chemicals and activities that could further damage your nails. If you need to use polish, opt for a nourishing base coat and a breathable formula. Give your nails time to regain their natural strength and thickness.
Frequently Asked Questions
Is it safe to remove acrylic nails at home?
Yes, it’s safe to remove acrylic nails at home when you use the correct tools and follow a gentle, methodical process. Aggressive or improper removal techniques can cause damage, but with patience and the right approach, home removal is perfectly viable. Publications like Marie Claire have featured detailed guides on safe at-home removal.
How long should you soak acrylic nails in acetone?
For the acetone soak method, aim for approximately 20 to 30 minutes. The goal is to allow the acetone to soften the acrylic sufficiently for gentle removal. If the acrylic is thick or old, you may need to soak for longer periods, up to 45 minutes, in 10-15 minute increments, re-soaking as needed.
What happens if you leave acrylic nails on too long without removal or maintenance?
Leaving acrylic nails on for extended periods without proper maintenance or removal can lead to several issues. These include damage to the natural nail from moisture being trapped underneath, potential fungal or bacterial infections, weakened natural nails, and difficulty during eventual removal. Regular fills or timely removal are important for nail health.
Can I use regular nail polish remover instead of pure acetone?
No, standard nail polish remover is generally not effective for removing acrylic nails. It contains different solvents and often includes moisturizing agents that dilute its strength. Pure acetone (100%) is In particular formulated to dissolve acrylics and gels, making it the necessary product for this process. Using less potent removers will likely result in frustration and prolonged, ineffective soaking.
How often should I take breaks from wearing acrylic nails?
Nail health experts generally recommend taking breaks from acrylic nails periodically to allow your natural nails to recover and regain strength. A common recommendation is to take a break every 2 to 3 months of continuous wear. During these breaks, focus on nourishing and strengthening your natural nails with oils and moisturizers.
Conclusion
Removing acrylic nails safely at home is a straightforward process when approached with the right knowledge and tools. By avoiding aggressive techniques and prioritizing gentle methods like proper soaking with pure acetone, you can protect your natural nails from damage. Remember that patience is your greatest ally. Once the acrylics are off, diligent aftercare—focusing on hydration and nourishment—will help your nails recover quickly, restoring them to their healthy, natural state. As of April 2026, the emphasis remains on maintaining nail health through careful removal and consistent care routines.
Source: Britannica
Related Articles
- Trader Joe's Halloween Bags: Eco-Friendly &. Spooktacular Fun for 2026
- Investment Watches for Women 2026: Precision Meets
- Japanese Street Style: Tokyo Fashion 2026
Editorial Note: This article was researched and written by the The Boutique Modesto editorial team. We fact-check our content and update it regularly. For questions or corrections, contact us.